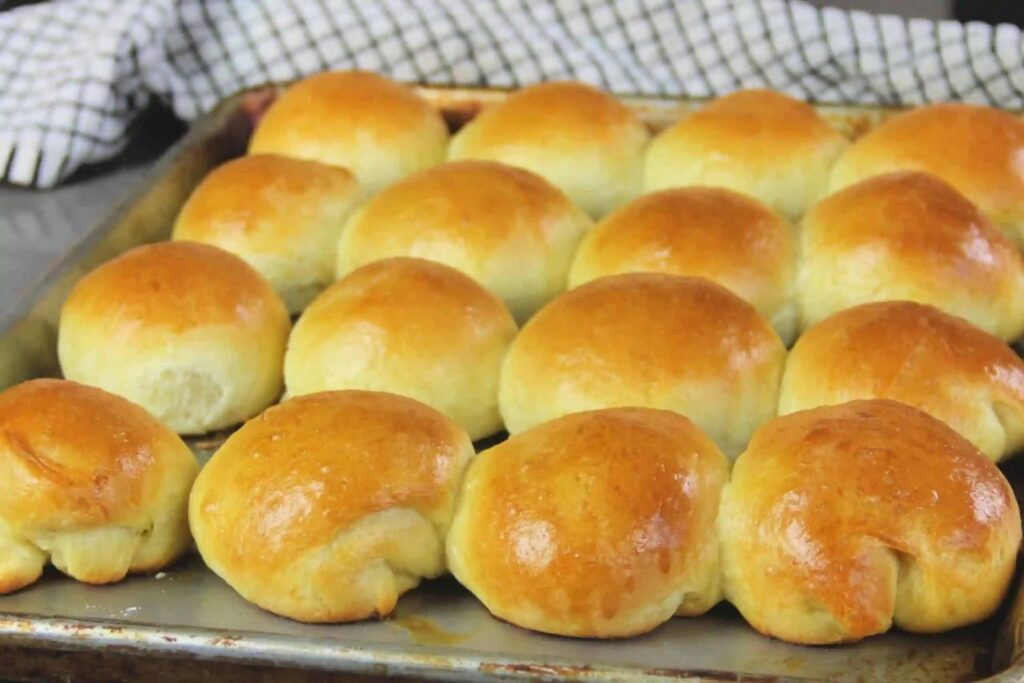
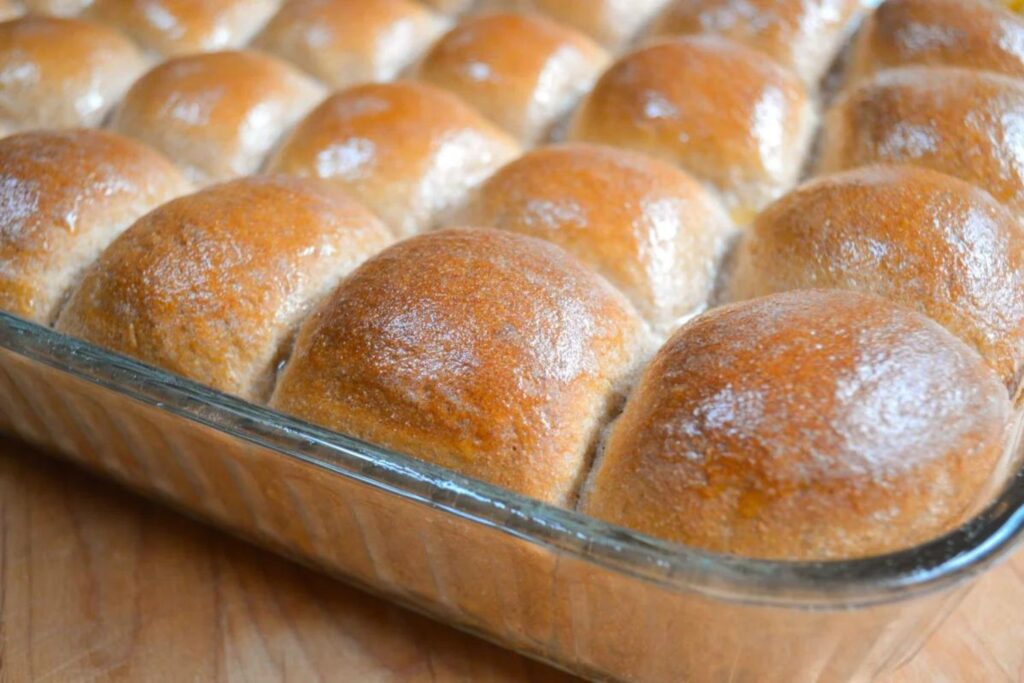
There’s something undeniably comforting about the warm aroma of freshly baked dinner rolls in aluminum pans wafting through your kitchen. Imagine opening the oven to reveal a batch of golden brown, perfectly shaped rolls that look as good as they taste. If you dream of achieving this culinary delight using an aluminum pan, you’re in for a treat! Aluminum pans are not just affordable; they’re also fantastic at conducting heat, helping create that irresistible crust we all crave.
But how do you turn those simple ingredients into fluffy perfection? This guide will walk you through essential tips and techniques for making dinner rolls in aluminum pans that are visually stunning and deliciously satisfying. So grab your apron and dive into the secrets behind those perfect golden-brown dinner rolls!
Understanding The Role Of The Dinner Rolls In Aluminum Pans In Achieving

Aluminum pans are a baker’s best friend when it comes to achieving that coveted golden brown crust. Their excellent heat conductivity ensures even baking, crucial for rolls that rise beautifully while developing the right texture.
The shiny surface of aluminum reflects some heat away, preventing over-browning and allowing optimal cooking times. It means you’re less likely to end up with burnt bottoms or unevenly cooked rolls.
Additionally, aluminum’s lightweight nature makes it easy to handle. You can swiftly move your pan in and out of the oven without risking spills or burns.
If covered loosely with foil, these pans can also help create steam during baking, enhancing moisture retention. That combo leads to soft interiors paired with crisp exteriors—everything you want in dinner rolls!
Tips For Preparing Aluminum Pan Before Baking

Before baking, it’s crucial to prepare your aluminum pans properly. Start by ensuring they are clean and free from residue. A quick wash with warm, soapy water does wonders.
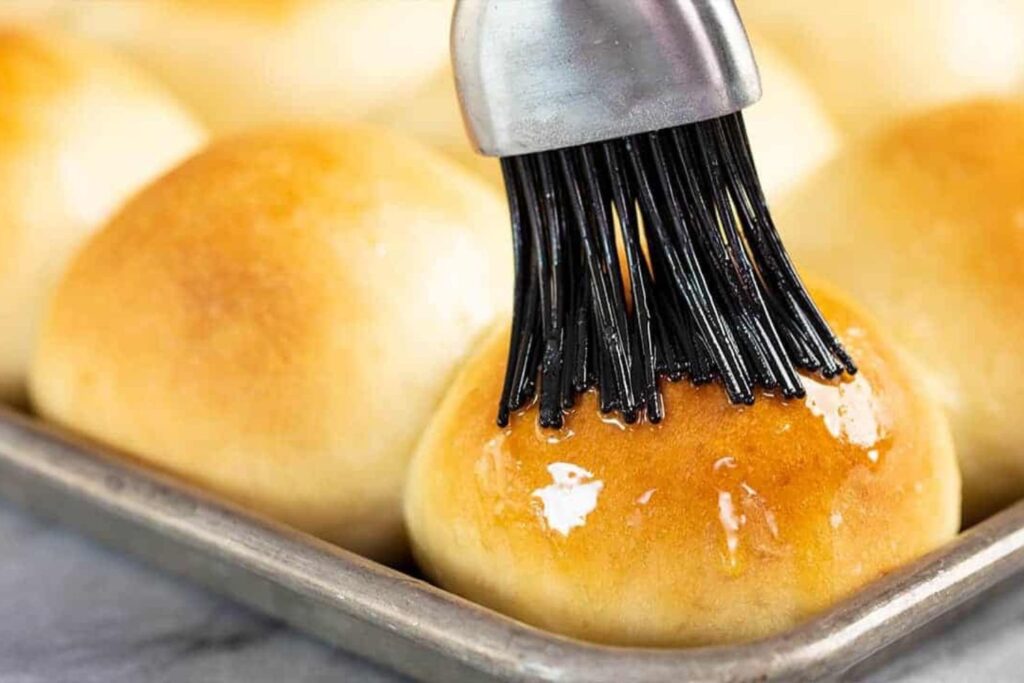
Next, consider greasing the pan. Use butter or a non-stick spray to coat the interior evenly. It prevents your dinner rolls from sticking and helps achieve that perfect golden color.
Sprinkling flour after greasing is beneficial if you want an extra-crisp crust. Shake off the excess flour before adding your dough.
Preheating the empty aluminum pan for a few minutes can also enhance browning for those who prefer a deeper flavor in their rolls. Just be cautious—don’t leave it too long, or it may become too hot to handle!
These simple steps set you up for success as you create delicious dinner rolls in aluminum pans.
Choosing The Right Ingredients And Techniques For Optimal Browning

Selecting the right ingredients is crucial for achieving that perfect golden brown crust on your dinner rolls in aluminum pans. Fresh yeast can make a significant difference. It ensures a good rise, which promotes even browning.
Using high-quality flour also matters. Bread flour has a higher protein content, improving structure and color. Don’t forget about sugar—both coarse and active dry varieties contribute to browning through caramelization during baking.
Incorporating fats like butter or oil enhances the flavor while helping with moisture retention. This balance keeps the dough soft but allows it to develop a lovely crust.
Kneading techniques are equally important. Properly knead your dough until it’s smooth and elastic; this helps create the air pockets essential for achieving an airy texture inside your rolls. Resting the dough after kneading allows gluten development, supporting optimal browning when the rolls hit the oven heat.
Baking Techniques: Time, Temperature, And Checking For Doneness
The baking time and temperature are crucial for perfect dinner rolls in an aluminum pan. Preheat your oven to around 375°F (190°C). This temperature helps achieve that beautiful golden brown crust while ensuring the inside remains fluffy.
Keep an eye on the clock, but don’t rely solely on it. Most recipes suggest baking for about 20-25 minutes. However, ovens can vary widely.
To check for doneness, gently tap the bottom of a roll; it should sound hollow. Alternatively, you can use a thermometer—aim for an internal temperature of around 190°F (88°C).
Remember that carryover cooking happens even after removing them from the oven. So be cautious not to overbake!
Troubleshooting Common Issues When Using Aluminum Pans For Dinner Rolls
Using aluminum pans for dinner rolls can sometimes lead to unexpected results. If your rolls are browning too quickly, it might be due to aluminum’s high conductivity. Lowering the oven temperature by 25°F can help achieve a more even bake.
Another common issue is uneven baking. This often occurs if the pan is placed in the center of the oven. Make sure there’s enough space around it for heat circulation.
If your rolls stick to the pan, consider greasing or lining them with parchment paper before adding dough. This simple step makes removal easy and minimizes damage.
Humidity can affect dough rise and texture. On particularly humid days, you might need to adjust flour measurements slightly or add extra kneading time for better consistency in your dinner rolls. Keep experimenting until you find what works best!
Elevating Your Dinner Rolls To The Next Level With Toppings Or Fillings
Transform your dinner rolls into a gourmet experience with delightful toppings and fillings. Imagine soft, fluffy rolls filled with cheese that melts beautifully or savory herbs to elevate flavor.
Consider adding garlic butter for an irresistible aroma. A sprinkle of sea salt on top enhances the taste, creating a perfect balance between savory and buttery goodness.
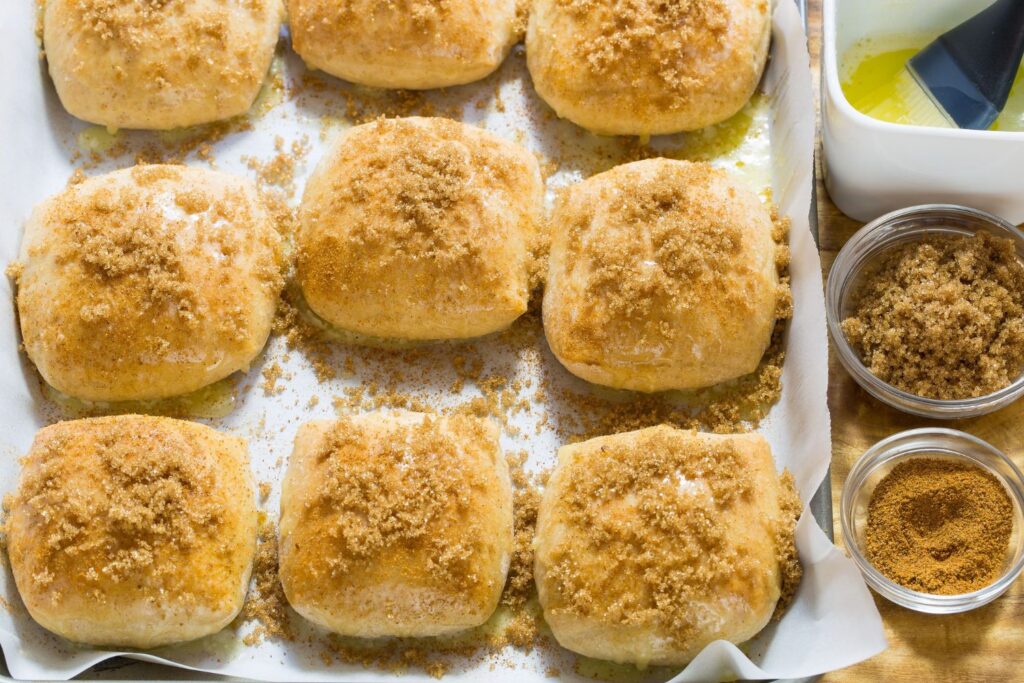
Before baking, you can also experiment by incorporating sweet elements like honey or cinnamon sugar. It adds a hint of sweetness that pairs wonderfully with rich meals.
For those who love a bit of crunch, why not try seeds? Sesame or poppy seeds sprinkled on top create texture while enhancing visual appeal.
Don’t shy away from unique fillings like caramelized onions or roasted peppers. These ingredients introduce unexpected layers of flavor that will leave guests asking for more at every gathering.
Alternative Methods For Achieving Golden Brown Dinner Rolls Without Aluminum Pans
If you don’t have aluminum pans, fear not. There are several alternative methods to achieve those perfect golden brown dinner rolls.
Consider using cast iron skillets. They retain heat well and provide even cooking, resulting in beautifully browned crusts. Plus, they add a rustic touch to your presentation.
Another option is baking on a stone or steel surface. Preheat the stone for optimal heat retention. This method mimics commercial ovens and can produce bakery-quality results at home.
Also, try parchment-lined baking sheets. They allow for easy release while evenly distributing heat across your rolls, ensuring that lovely color develops.
Individual ramekins can also work wonders! Place dough balls inside them for an attractive presentation and uniform browning without needing aluminum pans.
YouTube Video
Conclusion
Achieving perfectly golden brown dinner rolls in aluminum pans requires attention to detail and a few essential techniques. Understanding how aluminum pans conduct heat can create that coveted crust while maintaining a soft interior. Properly preparing your pans beforehand can make a significant difference.
Selecting the right ingredients is equally crucial. Opt for high-quality flour and fresh yeast to enhance flavor and texture. Pay close attention to baking times and temperatures; these factors are vital for achieving optimal browning.
Troubleshooting common issues will help refine your process over time. Whether adjusting oven temperature or using an egg wash for extra sheen, each tip brings you closer to perfection.
Remember that adding toppings or fillings can elevate your rolls beyond the basics, making them even more appealing at the dinner table. If you’re looking for alternatives, there are ways to achieve similar results without aluminum pans.
With practice and patience, you’ll master the art of baking dinner rolls in aluminum pans that look beautiful and taste heavenly!